Getting paid is the oxygen for your business. Sending out an easy-to-understand, easy-to-pay invoice is key to making sure you’re paid on time.
Every Invoice you send should clearly tell your client who you are, payment details, how much they owe, and how to pay.
When you go to send a newly created Invoice, Lnvo automatically generates a document (pdf and link) with all those details and frictionless payment options.
Lnvo gives you the option to quickly create an invoice from almost any view such as:
- from inside a client or project
- from the Clients, Projects, or Documents Tab
- or converting an estimate into an invoice
>> Jump to Steps for Document Invoicing
>> Jump to Steps for Creating an Invoice from an Estimate
Document vs Project Invoicing
Lnvo supports two types of invoicing depending on your needs. The most common and default method is “Document Invoicing”.
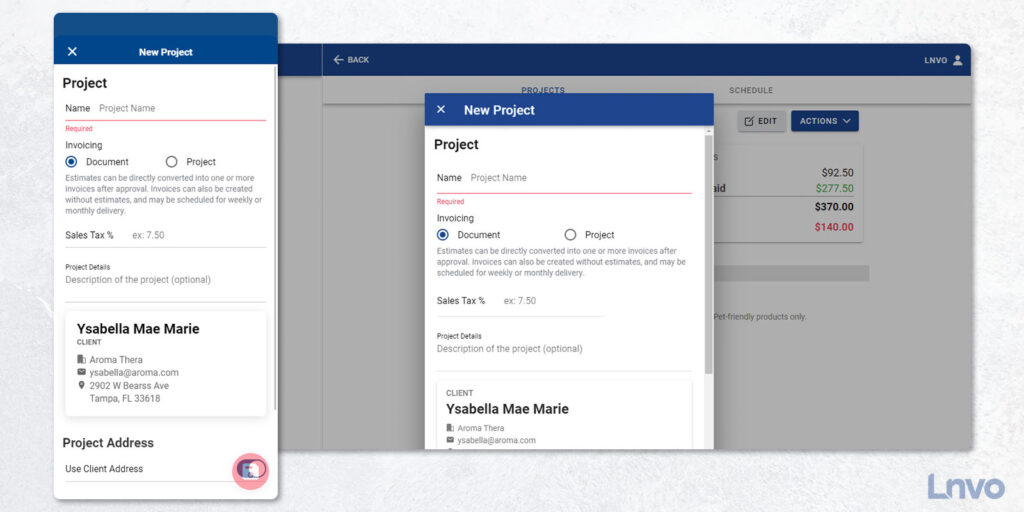
Document Invoicing works as you’d expect. You are simply creating an invoice with or without an estimate and are able to schedule repeat or future delivery.
Project Invoicing creates invoices based on the approved project balance. That balance is based on an initial estimate, change orders, and any previously invoiced amounts. Plus, every invoice will include the entire project history.
If you’re looking for the most simplistic form of invoicing and don’t need to account for change orders or entire project based revenue, then choose Document Invoicing.
Either way, you’ll be able to look at any project and see if it has been set to Document or Project Invoicing.
Document Invoicing: Creating a New Invoice
When using Document Invoicing (chosen from inside a project) every invoice includes the following:
- Scheduling
- Payment Terms
- Description
- Client & Project
- Items to Invoice
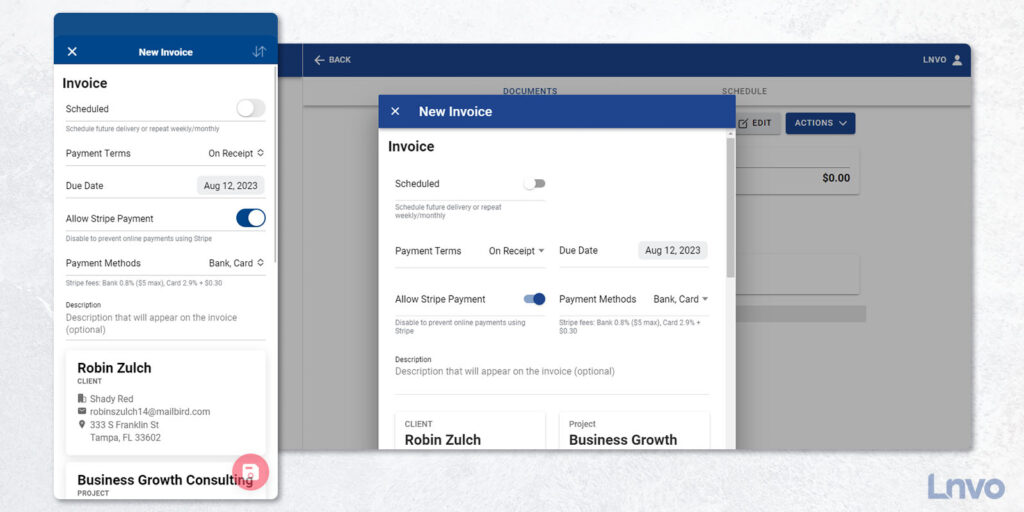
Start by tapping the action button and selecting New Invoice.
At the top of the New Invoice page, the first toggle allows you to enable scheduling your invoice to send via email at a future date or on a reoccurring basis (such as weekly, bi-weekly, or monthly).
Next, you can set your payment terms or when you want to get paid. If you want to be paid immediately, keep the Payment Terms set to “On Receipt”.
If you want payment due in a specific amount of days use one of the given options or choose a custom date. Net 7 means the invoice is due in 7 days and likewise for the other options.
Underneath the due date you can toggle on or off online payments via Stripe. Going one step further you can toggle on/off whether you want to accept bank or credit card payments.
Next, you have an optional place to write a project description that will also show up on the invoice for your client.
If you’re starting inside a project the current client and project will automatically be tied to the invoice. From the Documents tab, you’ll be asked to either create or search for a client and project.
Next, you’ll input your line items including:
- Description
- Price
- Quantity
- If the item is a Discount or not
- If Tax applies
- Any extra optional Details for the line item
All of these items will be auto calculated for you including price per quantities, discounts, and tax.
Note: Tax is set inside each project (as that amount can vary depending on where your project is). Edit the project in order to edit or set the tax percentage.
When you are done, tap the “Save” button and you’ll be immediately brought to a view of the document itself including an overview, history, and preview of the PDF.
And then when you’re ready to send, click the “Send” button and choose “Send by Email” or “Text or Share”.
Creating an Invoice from an Estimate (and Invoicing a Project)
Whether using Document or Project Invoicing, creating an invoice from an estimate are very similar. In both instances, the estimate must be approved before you can convert it into an invoice.
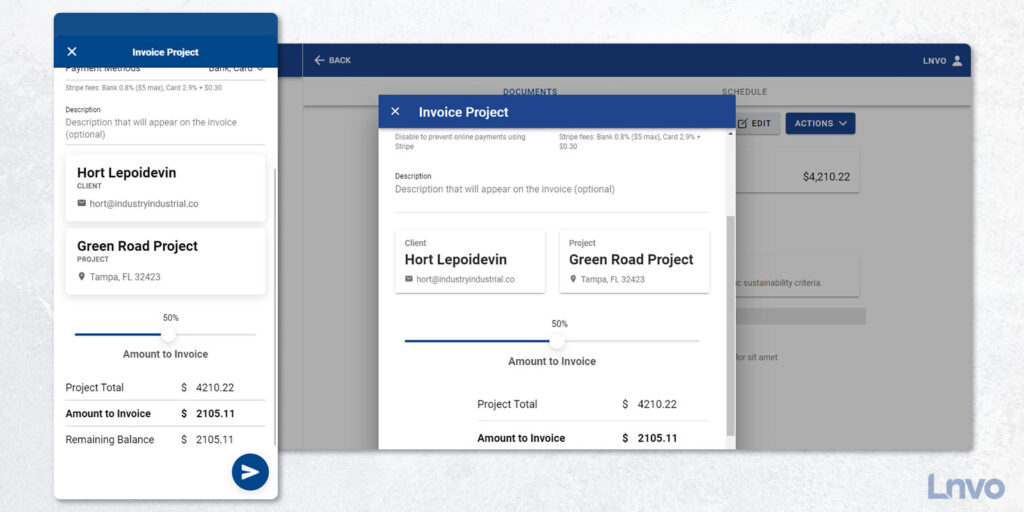
If you’re using Document Invoicing, you’ll select the estimate you’d like to invoice and click the “Invoice” button.
If you’re using Project Invoicing, you will have to be in the project itself and use the action button to select “Invoice Project”.
When you create an invoice from an estimate, you’ll be able to set payment terms and choose what percentage of the estimate you want to invoice.
For instance, maybe you want to invoice 50% of the estimate up front. At the bottom of the invoice you’ll see a slider that allows you to choose the exact percentage you’d like to invoice, whether it’s 20% or all of it!
When you’re done and ready, click the Send button to immediately email, text, or share the invoice and Client Portal link.
