
Knowledge Base
Browse our knowledge base for 24/7 support with how-to guides & videos at your fingertips. Have a question or request we haven't answered? Contact us directly.
- •
- How-To, Knowledge Base, Lnvo
- •
- < 1 min read
Whether you’re a business owner, contractor, or freelancer there are two things you need more of… time and money.
Lnvo was built to save you time, get you paid faster, and go beyond simple invoicing.
Start here to quickly find support on the tools built to help grow your business and learn about all the important features.
Welcome to Lnvo!
- •
- Knowledge Base
- •
- 4 min read
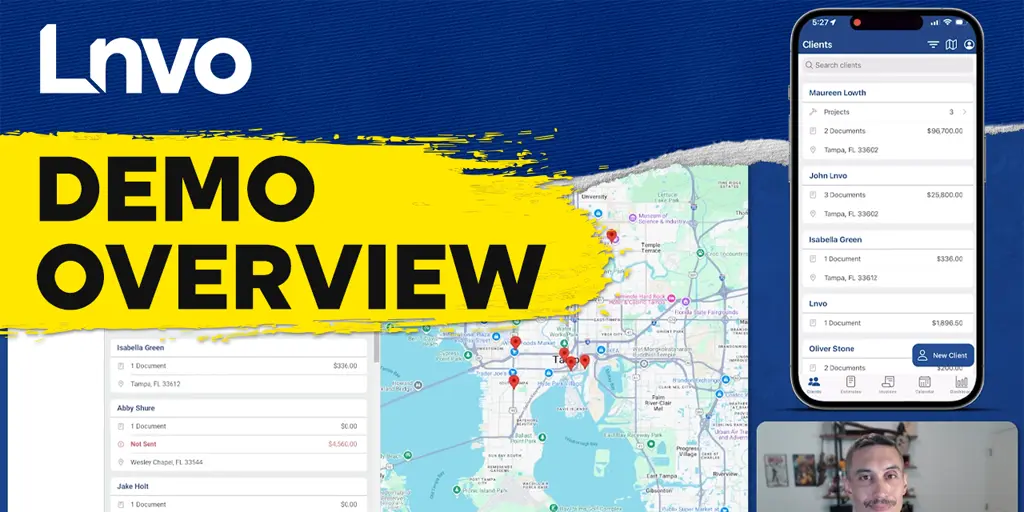
Lnvo is a comprehensive business management software designed to streamline invoicing, estimates, client and project management, and more—all accessible on both desktop and mobile. In this video, Chris, Creative Director at Team Lnvo, walks through the powerful features of this user-friendly tool, demonstrating how Lnvo can reduce business management headaches and save time.
- •
- How-To, Knowledge Base, Lnvo
- •
- 3 min read
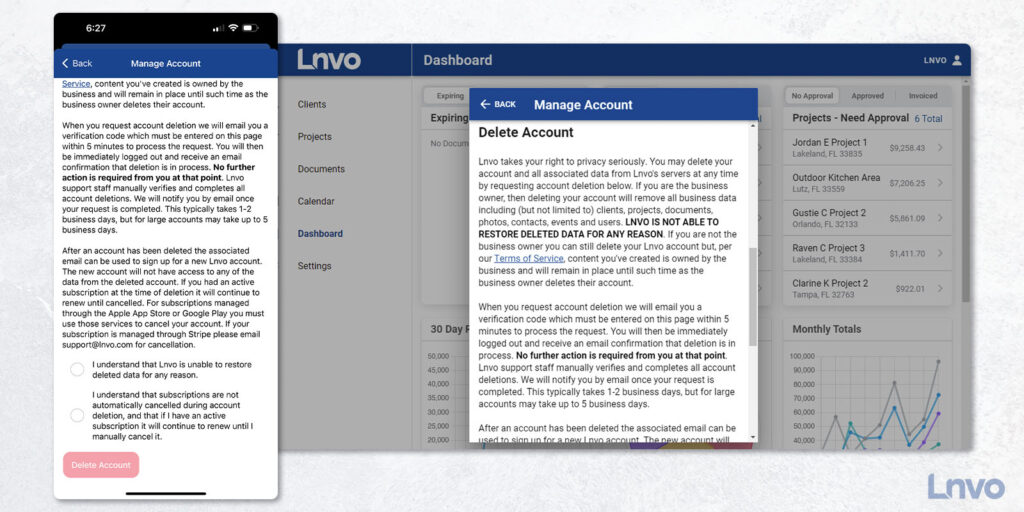
Lnvo takes your right to privacy seriously. You may delete your account and all associated data from Lnvo's servers at any time by requesting account deletion in the Settings menu of the Lnvo app. If you are the business owner, then deleting your account will remove all business data including (but not limited to) clients, projects, documents, photos, contacts, events and users.
PLEASE NOTE: LNVO IS NOT ABLE TO RESTORE DELETED DATA FOR ANY REASON.
If you are not the business owner you can still delete your Lnvo account but, per our Terms of Service, content you've created is owned by the business and will remain in place until such time as the business owner deletes their account.
- •
- How-To, Knowledge Base, Lnvo
- •
- 3 min read
Creating an estimate in Lnvo is a straight forward process and can be created one of two ways:
Inside a project
In the Documents view
From either of these two places inside the app you’ll be able to choose “New Estimate” from the action menu.
Note: There is one exception for Project Invoicing. If you already have an estimate in the project then you would create a New Change Order instead.
Now, whether or not you need to use an estimate is up to you and how your business works. If you are using Project Invoicing you must start with an Estimate.
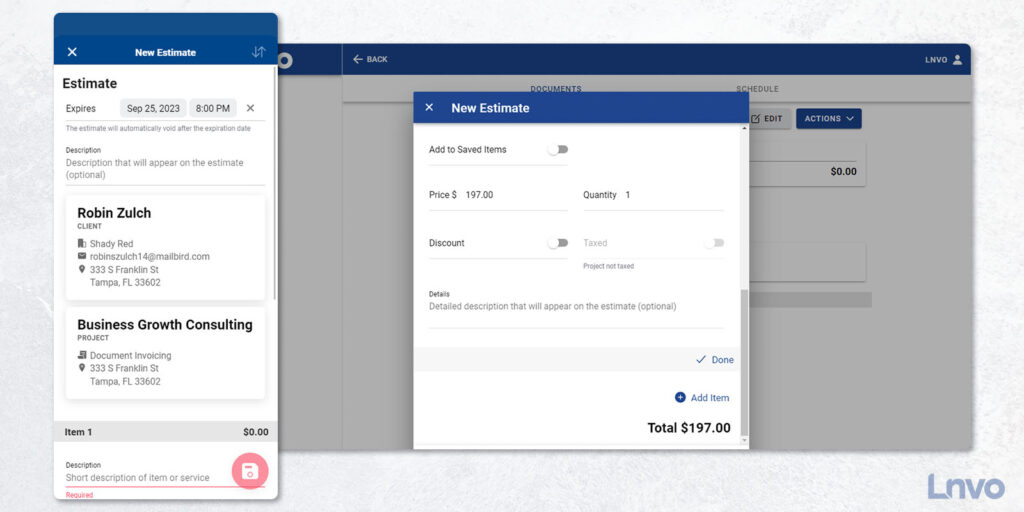
Setting Up Your Estimate
Once you’ve selected “New Estimate” the first toggle you’ll see is if you want to have the estimate expire.
Adding an expiration to an estimate means that if the client does not approve it by your specific time the estimate will automatically be marked void.
This protects you and the client since things change over time and you will also want them to take action sooner than later.
Note: In your Document Settings you can turn on email reminders that will get automatically sent to your client for expiring estimates.
If you started inside a project, you’ll automatically have your selected client and project attached to your invoice. Otherwise create or add your client and project now.
Finally, add your items that make up your estimate:
Description
Price / Quantity
Enable Discount (if it applies)
Enable Tax (if it applies)
Extra Details
Add as many items as you need and when you’re ready tap the “Save” button.
This will save and take you into a view of the Estimate with several actions you can take:
Send to Client (Email or Text/Share)
Edit the Estimate
Manually Mark as Approved
Duplicate
Void
Delete
When you send your Estimate off to your client, they will be sent a Client Portal link to review the document and Lnvo will capture their Digital Signature as part of the approval process.
Their digital signature will show up on the finalized PDF for your estimate. And, once you have an approved estimate you can easily turn it into an invoice and get paid.
- •
- How-To, Knowledge Base, Lnvo
- •
- 5 min read
Getting paid is the oxygen for your business. Sending out an easy-to-understand, easy-to-pay invoice is key to making sure you’re paid on time.
Every Invoice you send should clearly tell your client who you are, payment details, how much they owe, and how to pay.
When you go to send a newly created Invoice, Lnvo automatically generates a document (pdf and link) with all those details and frictionless payment options.
There are three ways to create an invoice in Lnvo:
from inside a project
while viewing the Documents tab
or converting an estimate into an invoice
>> Jump to Steps for Document Invoicing
>> Jump to Steps for Creating an Invoice from an Estimate
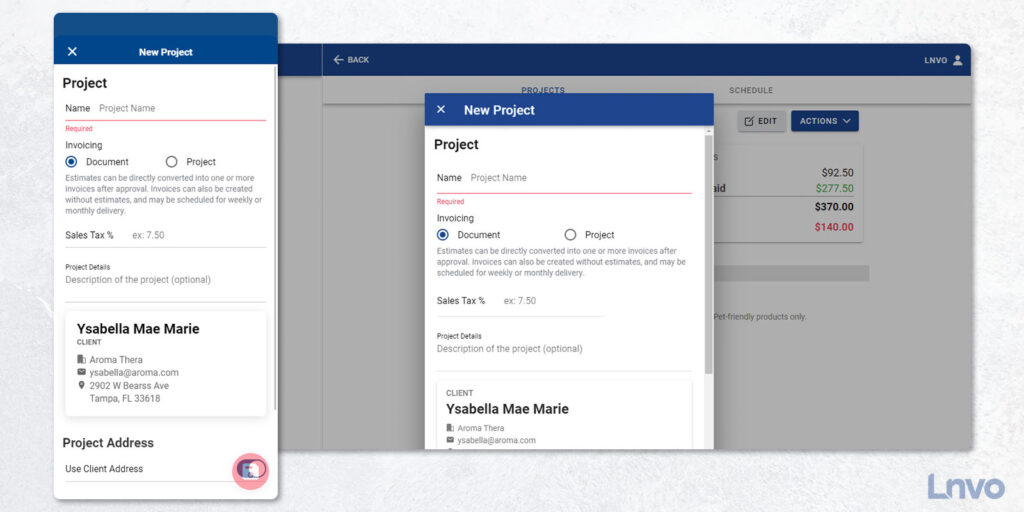
Document vs Project Invoicing
Lnvo supports two types of invoicing depending on your needs. The most common and default method is “Document Invoicing”.
Document Invoicing works as you’d expect. You are simply creating an invoice with or without an estimate and are able to schedule repeat or future delivery.
Project Invoicing creates invoices based on the approved project balance. That balance is based on an initial estimate, change orders, and any previously invoiced amounts. Plus, every invoice will include the entire project history.
If you’re looking for the most simplistic form of invoicing and don’t need to account for change orders or entire project based revenue, then choose Document Invoicing.
Either way, you’ll be able to look at any project and see if it has been set to Document or Project Invoicing.
Document Invoicing: Creating a New Invoice
When using Document Invoicing, creating an invoice from inside a project or while on the Documents tab has an identical process:
Scheduling
Payment Terms
Description
Client & Project
Items to Invoice
From either view start by tapping the action button and selecting New Invoice.
At the top of the New Invoice page, the first toggle allows you to enable scheduling your invoice to send via email at a future date or on a reoccurring basis (such as weekly, bi-weekly, or monthly).
Next, you can set your payment terms or when you want to get paid. If you want to be paid immediately, keep the Payment Terms set to “On Receipt”.
If you want payment due in a specific amount of days use one of the given options or choose a custom date. Net 7 means the invoice is due in 7 days and likewise for the other options.
Underneath the due date you can toggle on or off online payments via Stripe. Going one step further you can toggle on/off whether you want to accept bank or credit card payments.
Next, you have an optional place to write a project description that will also show up on the invoice for your client.
If you’re starting inside a project the current client and project will automatically be tied to the invoice. From the Documents tab, you’ll be asked to either create or search for a client and project.
Next, you’ll input your line items including:
Description
Price
Quantity
If the item is a Discount or not
If Tax applies
Any extra optional Details for the line item
All of these items will be auto calculated for you including price per quantities, discounts, and tax.
Note: Tax is set inside each project (as that amount can vary depending on where your project is). Edit the project in order to edit or set the tax percentage.
When you are done, tap the “Save” button and you’ll be immediately brought to a view of the document itself including an overview, history, and preview of the PDF.
And then when you’re ready to send, click the “Send” button and choose “Send by Email” or “Text or Share”.
Creating an Invoice from an Estimate (and Invoicing a Project)
Whether using Document or Project Invoicing, creating an invoice from an estimate are very similar. In both instances, the estimate must be approved before you can convert it into an invoice.
If you’re using Document Invoicing, you’ll select the estimate you’d like to invoice and click the “Invoice” button.
If you’re using Project Invoicing, you will have to be in the project itself and use the action button to select “Invoice Project”.
When you create an invoice from an estimate, you’ll be able to set payment terms and choose what percentage of the estimate you want to invoice.
For instance, maybe you want to invoice 50% of the estimate up front. At the bottom of the invoice you’ll see a slider that allows you to choose the exact percentage you’d like to invoice, whether it’s 20% or all of it!
When you’re done and ready, click the Send button to immediately email, text, or share the invoice and Client Portal link.
- •
- How-To, Knowledge Base, Lnvo
- •
- 2 min read
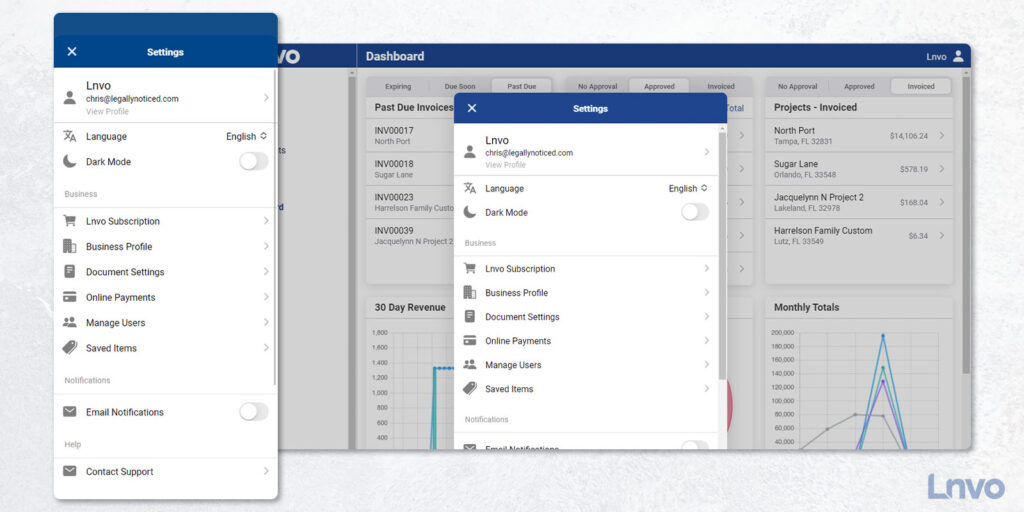
When you sign into Lnvo for the first time, one of the initial steps you should take is to update your Business Profile.
Start by clicking the User or Profile icon in the top right corner. This will bring up your Settings.
Updating your Business Profile & Document Settings are important first steps because this is where info will be pulled for your project documents and for integrating your Stripe account.
Don’t worry, you can always come back and update these anytime.
Under Business Profile you’ll be able to add your logo, contact info, and address.
You’ll also be able to add your website and a brief overview about your business - which is good practice to distill your business into a short pitch.
Under Document Settings you’ll see toggles for automatic client reminders, time zone, and what prefixes you’ll use on your documents.
We recommend the default prefixes for easy distinction, but you’re free to make it your own.
Also inside of settings you’ll be able to control:
Language Preference
Dark Mode On or Off
Your Lnvo Subscription
Setting Up Your Online Payments
Managing Users
Viewing and Adding Saved Items
Enabling Push and/or Email Notifications
Finally, you can also edit your personal user profile and password or contact support.
- •
- How-To, Knowledge Base, Lnvo
- •
- 2 min read
One of our core goals at Lnvo is to help you focus on what will grow your business.
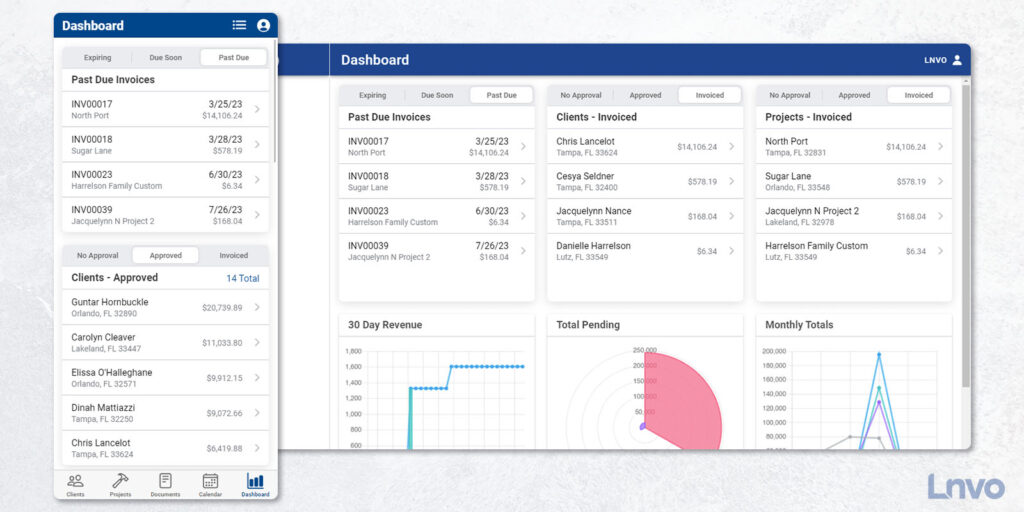
The Dashboard view is your at-a-glance reporting for some of the most important numbers and actions needed in your business.
Here you’ll find widgets you can reorder or turn on or off to your liking.
In a snap you can see documents, clients, and projects that need your attention.
Each document widget has three tabs showing you the latest five documents that match. If you have more than five that match you’ll see a total in blue in the top right of the widget. Tap that total and a complete list will appear in a new view.
The other great widgets in your dashboard include snapshot charts of your last 30 days of revenue, total amounts pending, and monthly revenue totals.
Each one is interactive to show you more info or hide what you don’t want to see.
Think of these graphs as a business health report. It’s always important to have a pulse on your business.
The last widget is Activity History. Here you can see every action that was taken in your Lnvo account, even if it's by another user.
You’ll find timestamped events such as photos being added to a project or an invoice being marked paid.
Think of Activity History as one amazing audit log so you can see who’s doing what and when.
Finally, if you click into any event in Activity History it’ll take you right to that client or project.
get in touch
Contact Support
Already reviewed the Knowledge Base? Still have a question? Have a feature request?
We know how important your business is to you and we are grateful for every single one of our Lnvo users.
We want to help. Use our form to get in contact with the Lnvo team. We will respond as soon as possible.